
Tips and technical advice from Kevin Jozefowicz,
Strateres Training and Product Specialist
Sony’s new receiver line has arrived and has been welcomed with open arms by our New England Sony dealers. Many dealers have ordered demo models and have received back-up inventory.
Sony has informed us that there is a firmware update available that dealers should be performing on receivers that they have in stock as well as any they receive in the near future. This firmware update involves following the steps below:
About this download
Benefits and improvements
- Fixes an issue where the Acoustic Center Sync center channel sound may not be heard
- Adds web browser setting functions
- Fixes minor issues
Please use the links below to access the downloadable updates for the new Sony receivers. These will be needed to unlock Web UI, so please get these loaded into your receiver inventory ASAP. Thank you!
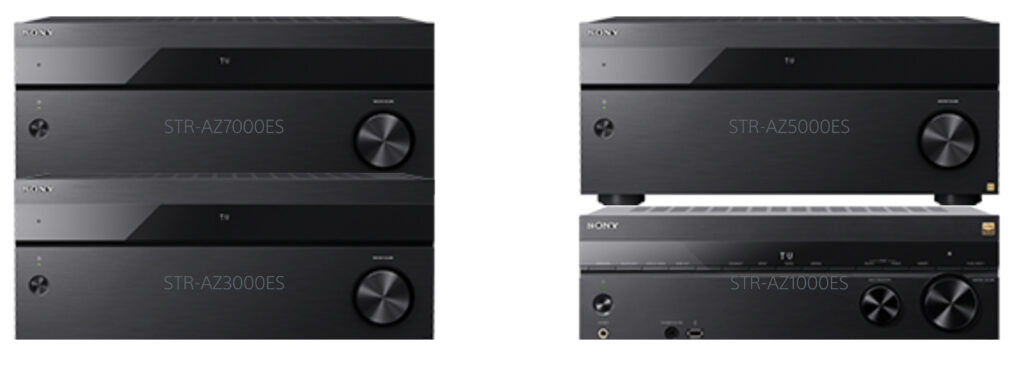
STRAZ1000ES: https://www.sony.com/electronics/support/audio-components-receivers-amplifiers/str-az1000es/downloads
STRAZ3000ES: https://www.sony.com/electronics/support/audio-components-receivers-amplifiers/str-az3000es/downloads
STRAZ5000ES: https://www.sony.com/electronics/support/audio-components-receivers-amplifiers/str-az5000es/downloads
STRAZ7000ES: https://www.sony.com/electronics/support/audio-components-receivers-amplifiers/str-az7000es/downloads
Preparation
Check the firmware version
Your firmware may already be up to date, especially if you have a new AV Receiver. If the version number is 1.237 or higher, you do not need to update.
If you’re not sure, it’s easy to check which version of firmware you have:
- Turn on your TV and make sure that it’s tuned to the input your AV Receiver is connected to, so if the AV Receiver is connected to the HDMI2 socket, choose HDMI2 as the input.
- Turn on the AV Receiver.
- Press HOME on the remote control and wait until you see the HOME screen.
- On the home screen, select Setup → System Settings with the arrow keys on the remote control and then press ENTER.
- Select System Information with the arrow keys on the remote control and then press ENTER.
- On the TV screen, if the version number is 001.237 or higher (the 1st and 2nd zeros of the software version number can be ignored), you already have the most recent firmware version.
There are two easy ways to update the firmware.
1.) Over the Network update.
2.) Update by use of a flash drive.
| Method | What you need | Why use this method? |
|---|---|---|
| Internet/network
|
|
This is the easiest way to update your firmware but can take up to 1/2 hour to update. |
| USB storage device
|
|
This is the fastest way to update your firmware and can take up to 15 minutes to update.Update your firmware this way if you can’t connect over the Internet. |


Download & Install
Updating via the Internet
We recommend this method as it’s the simplest way to update. It usually takes about 15–30 minutes. First set up the equipment, then download the update from the Internet.
What you need:
- an active internet connection (using a wireless router)
- a compatible TV
Set up the equipment:
- Turn on your TV and check that the input your AV Receiver is connected to has been selected. (So if the AV Receiver is connected to the HDMI2 port, choose HDMI2 as the input)
- Connect the AV Receiver to your internet source using a wireless router.
- Turn on the AV Receiver.
- On the remote control, press HOME and wait until you see the HOME screen.
Step 1: Install the update
- At the HOME menu, use the arrow keys on the remote control to select Setup → Software Update → Network update, and then press ENTER.
- When the message Update to a new software version. Never turn off the power while performing the update. Current version 00x.xxx New version 001.237 is displayed on the TV screen, select OK using the remote control and then press ENTER.
- The message Update Caution is displayed on the TV screen. Select OK using the remote control and then press ENTER.
- The AV Receiver downloads the firmware data from the Internet.
- After downloading, the AV Receiver restarts, and the main unit update starts. While the main unit is updating, the update progress status XX% is displayed on the front panel display.
- Once the main unit is updated, the AV Receiver will automatically restart again.
- The update is complete when the finish message appears on the TV.
Step 2: Confirm that the update was successful
Check the firmware version. If the version number is 1.237, the firmware update was successful.
Update via USB Memory Device and your PC
We recommend you use the Internet to update if you can. If not, you can use this method instead. You’ll download the update to your computer, transfer it to a USB memory device, then transfer it to your AV Receiver.
Preparations for Firmware Update
Before downloading the firmware, please ensure that your computer is running one of the following operating systems and prepare a USB flash drive.
Operating Systems
- Windows 11
- Windows 10
- Mac OS X
Step 1: Install the update
- Read and agree to the terms and conditions.
- Download the file AZ70STR-1_237.zip to your computer, making sure to remember the directory.
- Find the file on your computer, right-click it, and click Properties. Check the size is 510 MB (535 466 536 bytes).
Transfer the files to the USB storage device:
- Extract the update file from the AZ70STR-1_237.zip file.
- For Mac OS X operating system:
- Go to the location where the file was downloaded and double-click the AZ70STR-1_237.zip file.
- A new file will be created called F_ZSTR0.UPG.
- For Microsoft Windows operating system:
- Go to the directory where the file was downloaded and right-click the AZ70STR-1_237.zip file, and then click Extract All.
Note: For Windows, the default settings for Microsoft Edge will save the file in the Downloads folder. To locate the Downloads folder, click the Desktop tile from the Start screen and then locate the downloaded file using Windows Explorer. - At the Extract Compressed (Zipped) Folders window, click Extract.
- A new file will be created called F_ZSTR0.UPG.
- Go to the directory where the file was downloaded and right-click the AZ70STR-1_237.zip file, and then click Extract All.
- For Mac OS X operating system:
- Connect a compatible USB storage device to your computer.
- Transfer the F_ZSTR0.UPG file to the USB storage device:
- For Mac OS X operating systems: Drag and drop the F_ZSTR0.UPG file to the root folder of the USB device.
- For Windows operating systems:
- Go to the directory where the folder was created, and then right-click the F_ZSTR0.UPG file.
- From the menu, click Send To…, and then click the drive that represents your USB device (e.g. Removable Disk E:).
- The F_ZSTR0.UPG file will be copied onto your USB device.
Note: The update will not be performed if the folder is not copied to the root directory of the USB device or if the name of the folder is modified.
- After copying the F_ZSTR0.UPG file, remove the USB device from your computer
Transfer the update to your AV Receiver
First, get the equipment ready, then transfer the update to your AV Receiver.
Get the equipment ready:
- Turn on your TV and check it is tuned to the input your AV Receiver is connected to. (So if the AV Receiver is connected to the HDMI2 port, choose HDMI2 as the input).
- Turn on the AV Receiver.
- Press HOME on the remote control and wait until you see the HOME screen.
- Insert the USB that contains the F_ZSTR0.UPG file.
Transfer the update:
- At the HOME screen, using the arrow keys on the remote control, select Setup → Software Update → USB update, and then press ENTER.
- When the message Update to a new software version. Never turn off power while performing the update. Current version xxx.xxx New version 001.237 is displayed on the TV screen, select OK using the remote control and then press ENTER.
- When the message Update Caution is displayed on the TV screen, select OK using the remote control and press ENTER.
- The AV Receiver downloads the firmware data from the USB memory device.
- After downloading, the AV Receiver restarts, and the main unit update starts. While the main unit is updating, the update progress status XX% is displayed on the front panel display.
- Once the main unit is updated, the AV Receiver will automatically restart again.
- The update is complete when the finish message appears on the TV.
Step 2: Confirm that the update was successful
Check the firmware version. If the version number is 1.237, the firmware update was successful
If you need to troubleshoot issues related to your updating the receiver please refer to the download links provided at the beginning of this communication.